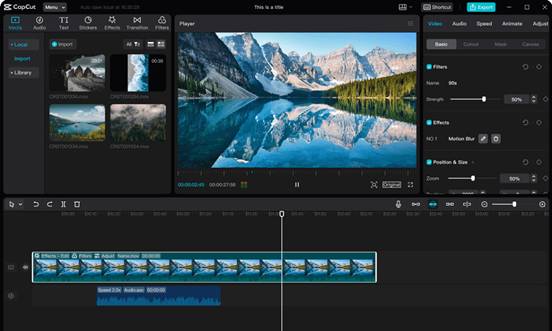
Starting a video editing project can feel overwhelming without proper media management. CapCut desktop video editor offers a simple solution, making it easier for beginners to organize their media. This software is designed to streamline your editing process. This allows you to focus on creativity rather than chaos. Download CapCut from its official website; note that some advanced features may require payment.
This blog will explore why organizing your media is crucial and how CapCut simplifies this task. By using this video editing software, you can enhance your projects and make the editing experience enjoyable. Dive into the blog to discover more about CapCut’s features and tips for effective media management!
Why Media Organization Matters in Video Editing
Well-organized media is key to a smooth video editing process. When files are sorted and labeled correctly, editors can find what they need quickly, leading to faster project completion. In contrast, cluttered media creates confusion and delays, as editors waste time searching for clips.
CapCut desktop video editor helps streamline this process with features like:
- Folders for easy access to specific media.
- Tagging to categorize files for quick retrieval.
- Previews to view clips without opening each one.
These tools enhance workflow efficiency. Proper organization allows editors to focus on creativity rather than getting lost in disarray, ultimately improving project outcomes.
Steps to Import and Organize Media in CapCut Desktop Video Editor
1. Installing CapCut Desktop Video Editor
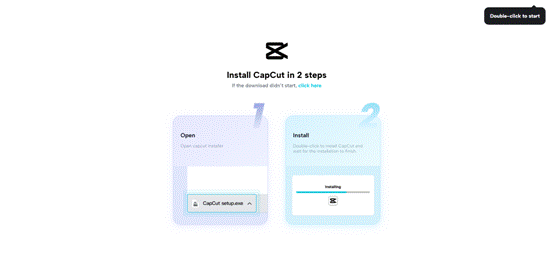
To install the CapCut desktop video editor, follow these simple steps for a secure setup.
- Open your browser and go to CapCut’s authorized website.
- Access the “Download” feature tailored for Windows or Mac. This assures you are using the freshest update.
- Once the download finishes, locate the installer file in your downloads folder and double-click it.
- Execute the steps shown on the screen to install. Decide on the installation location when instructed.
After installation, open CapCut and create an account. Signing up is possible via TikTok, Facebook, or Google. This helps you access more features. While CapCut is a powerful video editing software, some advanced tools may require payment for full access. Enjoy editing your videos with ease!
2. Importing Media Files
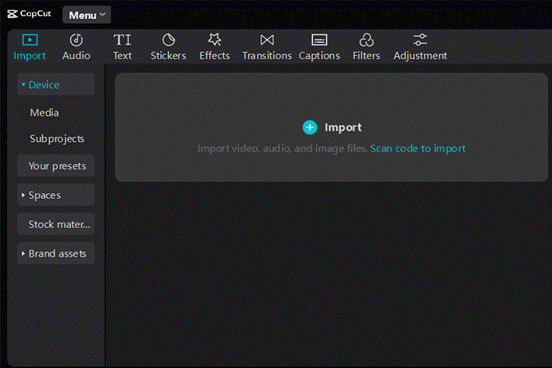
To upload videos, audio, and images into CapCut, start by opening the app and creating a new project.
- Click the Import button to select files from your computer.
- You can drag and drop files directly into the media library for quick uploads.
CapCut supports various file types, ensuring compatibility with most media formats. Once imported, CapCut automatically organizes your media into categories. This allows you to locate what you need with ease.
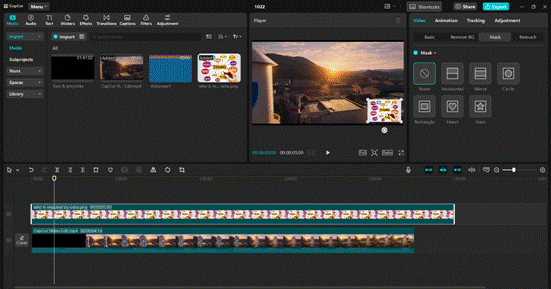
With everything in place, you can easily drag your files onto the timeline and start editing your project. This simple process allows you to focus on creativity without getting lost in file management.
3. Organizing Media in CapCut Desktop Video Editor
To keep your media organized in CapCut, follow these tips:
- Create folders and subfolders: Right-click in the media panel to create new folders. Name them based on content types, like clips or audio. This helps in easily locating files later.
- Insert labels and primary words: Categorize your media with tags. This makes searching for specific files quick and efficient. These tags help you filter the results.
- Preview media: Click on any clip to preview it before adding it to your project. This helps you choose the right files without cluttering your timeline.
- Utilize the video background remover: This feature enhances your videos by removing unwanted backgrounds and streamlining your workflow.
Following these steps, you can maintain a tidy workspace, making your editing process smoother and more enjoyable.
You can also use the AI caption generator to automatically transcribe speech from your video into accurate captions. This feature saves time and ensures accessibility to your content. Customize the captions’ font, size, color, and position to match your video’s style, creating a polished final product.
Additionally, CapCut offers a range of advanced tools, such as color grading, transitions, and audio enhancements, to help you elevate your project. Features like video background remover make it easy to isolate subjects and replace backgrounds, adding a cinematic touch to your videos. Whether you’re creating a short social media clip or a full-length video, CapCut provides intuitive controls to streamline your editing workflow and deliver professional results effortlessly.
Pro Tips for Effective Media Organization
Effective media organization is vital for smooth project management.
- Naming conventions for files help avoid confusion and ensure everyone understands the content quickly. Use clear, descriptive names that include project details and version numbers. This practice makes searching for specific files much easier.
- Regularly backing up media files and maintaining project versions protects against data loss and allows easy access to previous edits. This habit safeguards your hard work and provides peace of mind.
- In CapCut, arrange your timeline to group similar clips, making finding and editing media during production easier. A well-organized timeline can save you time and reduce frustration while working on complex projects.
- Utilize tools like an AI caption generator to save time when adding text, improving overall efficiency. This tool can automate captioning, allowing you to focus more on creative aspects.
These strategies enhance collaboration and streamline workflows, ensuring projects run smoothly from start to finish.
Wrapping Up
Importing and organizing media in the CapCut desktop video editor is essential for a smooth editing experience. You can quickly find what you need when you group similar clips and label them clearly. This makes tasks quicker and less stressful, so you can focus on what truly matters creatively. CapCut offers useful features for sorting your media, such as folders and tags, which make the editing process more efficient.
While many of these tools are free, some advanced features may require payment. Exploring these options can greatly enhance your projects and help you achieve a more polished final product. Remember, effective organization is the first step toward successful video editing. So, so take advantage of CapCut’s organizational features to streamline your workflow. Get started with the CapCut desktop video editor today to take your editing projects to the next level! Your expressive ideas deserve elite resources to shine brightly.


